I resumed sewing last month, after a 5 or 6 year hiatus. I discovered that during my time away from sewing, some new tools have come along that make sewing even easier and more enjoyable. Here are some of the new-to-me tools that I find very valuable. Further down the page, I also include some other discoveries along the way, some of my favorite tools from when I first began sewing as a teenager, some of the most useful presser feet (to me, so far), and finally, some of my favorite furniture items for the sewing room.
[I’ve linked to stores where these items can be purchased, but I receive no compensation for doing so; the links are included merely for the reader’s convenience.]
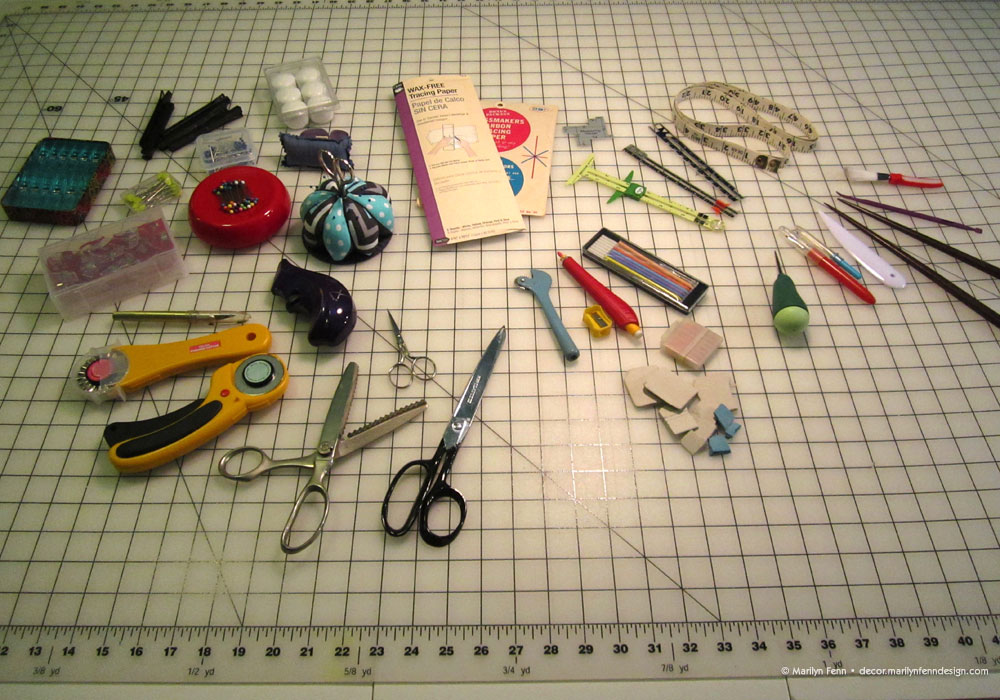 Sewing tools
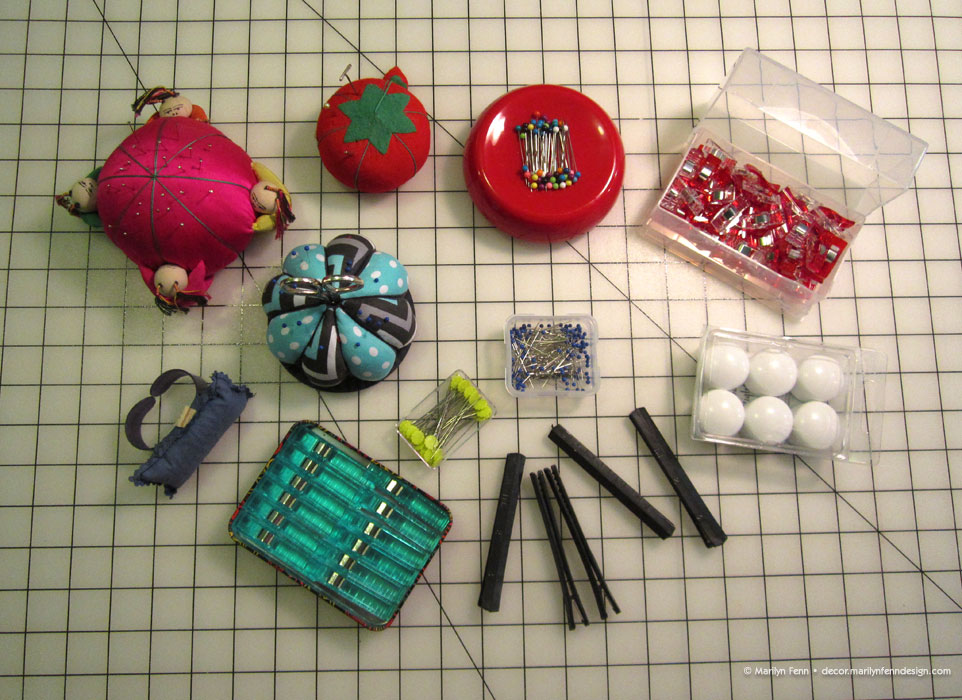


Wonder Clips
Possibly my favorite of all new sewing inventions, these plastic wonder clips are a fabulous sometimes replacement for pins! They will hold your fabric pieces together just about as well as pins, are more easily removable, and won’t prick your fingers while you are sewing. I got a set of 50 at a local sewing shop, but paid full price there. You can do better at Amazon. I do like the box mine came in, though. Very handy. Highly recommended.

Wonder clips
Magnetic Pin Cushion
Duh! What a great idea! I wonder why it took someone so long to think of this? The one I got came with these long, strong big-headed pins, which are also excellent. You can get the magnetic pin cushions in various shapes and colors; I opted for a round one that sort of mimics the canonical tomato-shaped pin cushions of yesteryear, in red, to match my room’s colors. If you don’t have one of these yet, get one! You won’t be sorry.
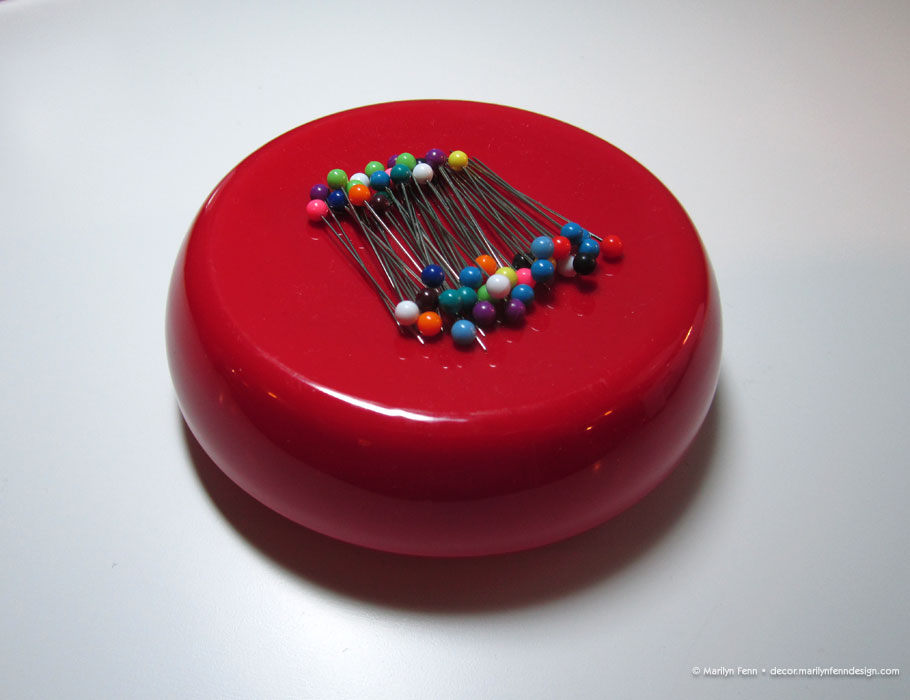
Magnetic pin cushion
Pin Cushion with Scissors
I picked this up on a whim at Jo-ann’s during my first shopping trip there in years. Boy, am I glad I did. It is one of the handiest little sewing tools I have; it stays right next to my sewing machine, where the surprisingly good little scissors get quite the workout. I pull them out to clip the threads on my sewing after every line of stitches. The cushion itself accepts pins more easily than my old tomato-shaped version.
Unfortunately, it’s not a regular item at Jo-ann’s (it’s on their “novelty” item aisle), and I can’t find a link to purchase one anywhere (but here’s an earlier, out-of-stock version in a different fabric at Jo-ann’s). If you happen across one at a store, I suggest you get it right then and there. The Jo-ann’s closest to me (on North Mopac) was out of them the second time I went there, though I did see a few at the Round Rock store this week. I think I will encourage Jo-ann’s to stock these. Really so useful. Plus this one matches my sewing room’s colors and design.
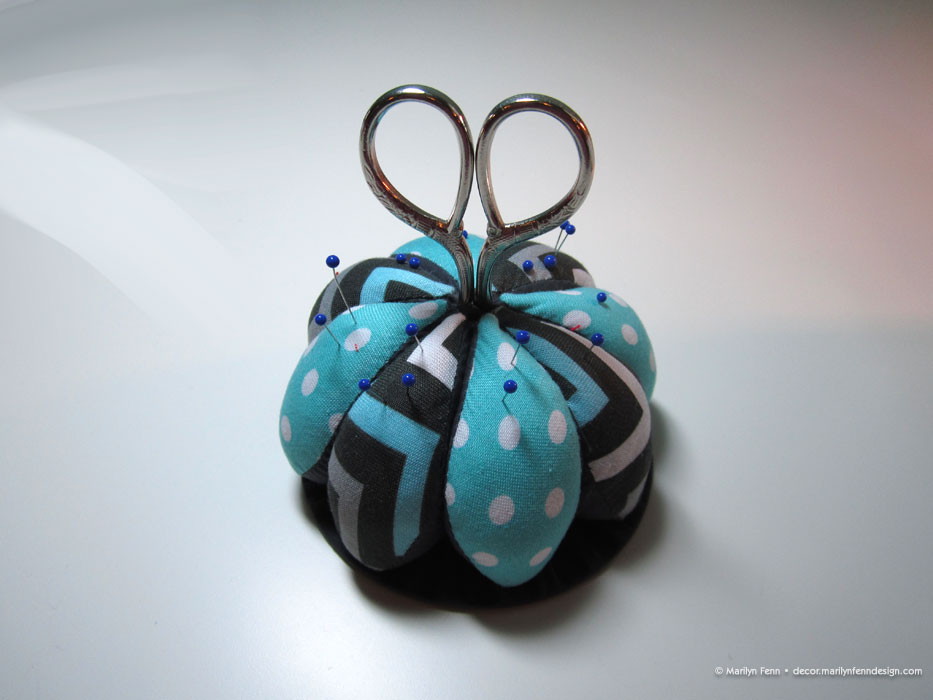
Pin cushion with scissors
Glass Head Pins
I’ve heard these are great to buy because you can iron right over them and not hurt them. I think it would hurt your iron, though. I like them because they are very long, very thin, and very easy to use. They can bend quite easily, so there’s that.
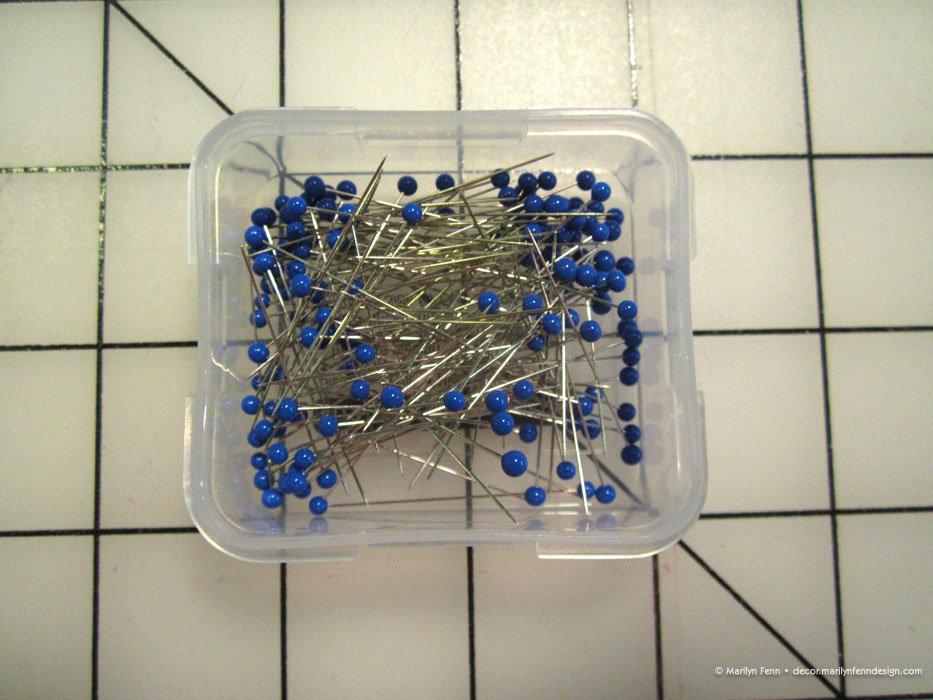
Glass headed pins
Flat Flower Head Pins
I’m sure quilters have great reasons for using these. I use them, due to the flatness of the pin heads, to pin leftover piping and binding tapes together wrapped on the original card, so everything stays flat, pins included.
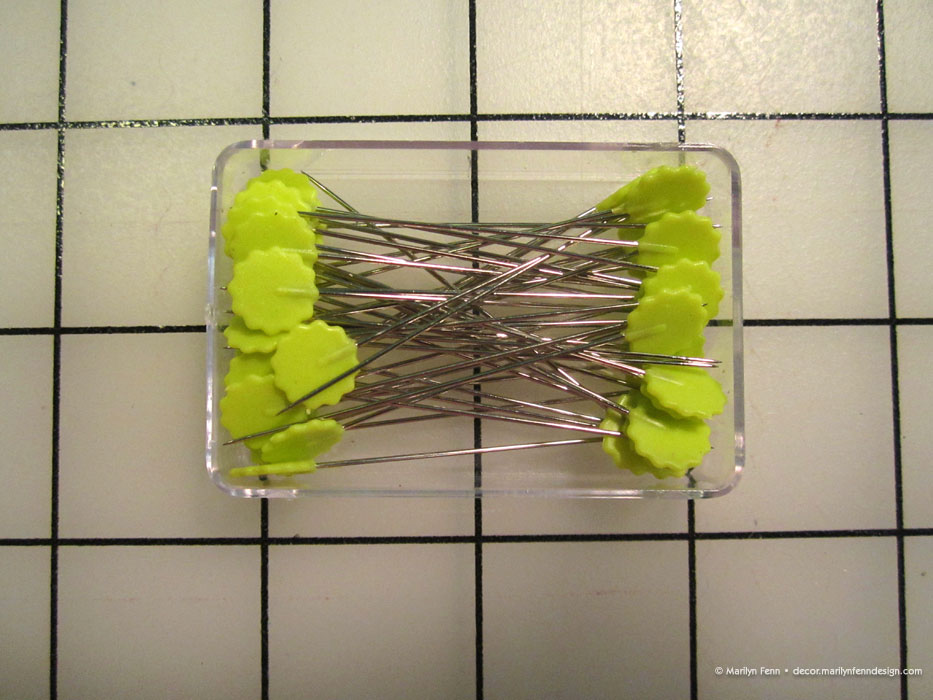
Flat flower headed pins
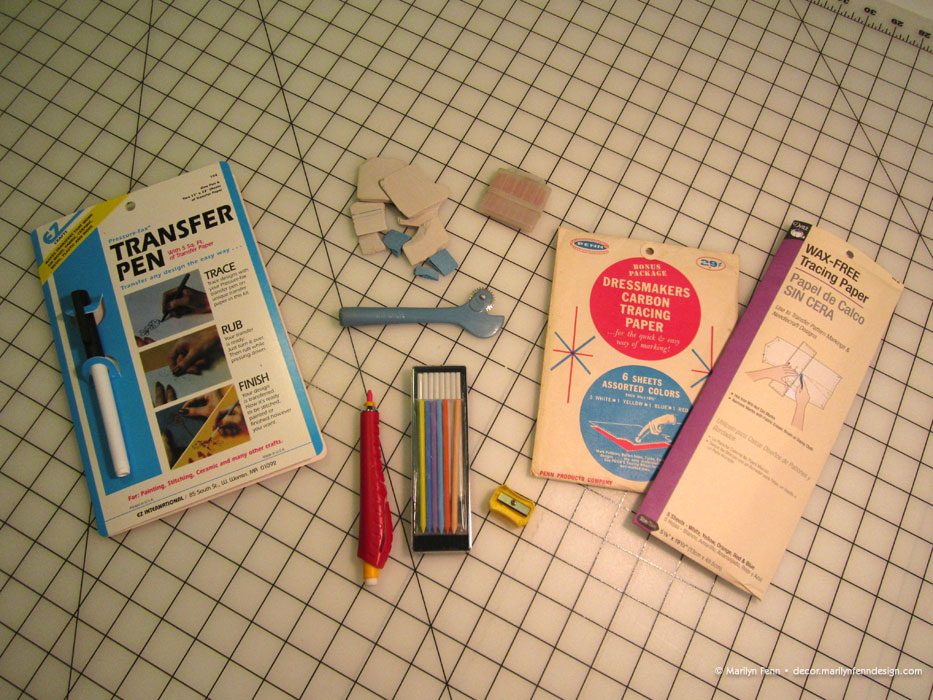
Chalk Cartridge Set
I love this; the chalk holder comes with two sets of chalk cartridges: 8 colors and 8 white. It can make sharp little lines when the chalk is still pointy (I haven’t tried sharpening them yet, but it does come with a little plastic sharpener). Even when blunted, the lines are a good width, and it’s easier to use than the blocks of chalk I grew up with.
Beware, though, ONLY use this on the back side of fabric in the seam area, as apparently, it does not easily wash out (if at all). I’ve also read that one can’t find replacement chalk for it, so keep that in mind; if you can use a 40-50% off coupon, the price is probably fine, even to buy the whole kit again, if need be. I use it sparingly for special marks, so I imagine the 16 pieces of chalk it came with should last me for possibly the rest of my sewing life.
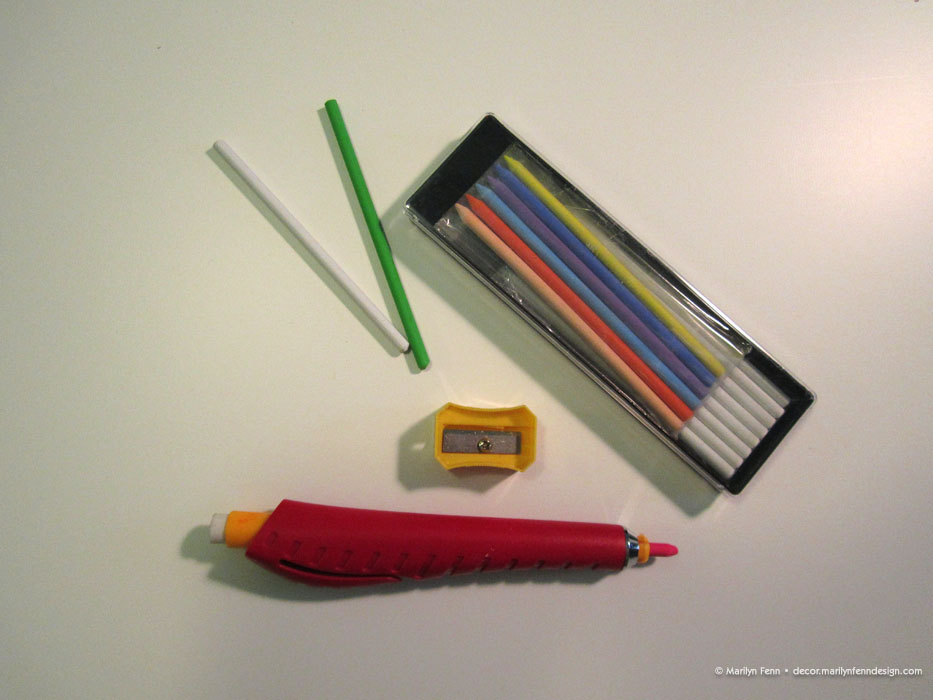
Chalk pencil set
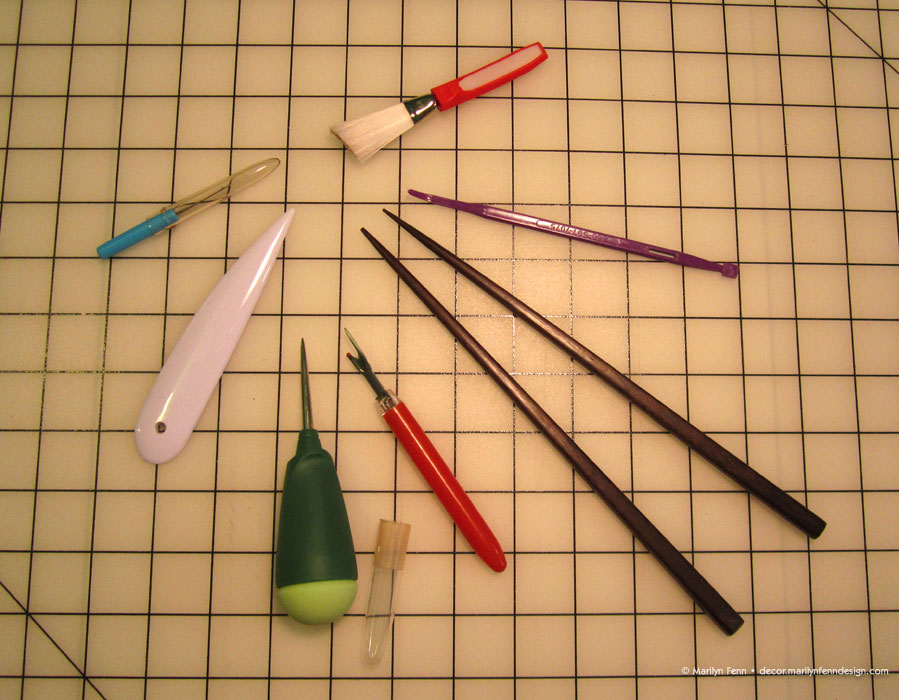
Bodkin
I can’t believe I never even knew what a bodkin was! This should have been a required tool way back in junior high school. A bodkin is used for grabbing the end of elastic or a drawstring to pull through a casing. I’ve always used a closed safety pin to do that, but a bodkin gets the job done much faster and easier.
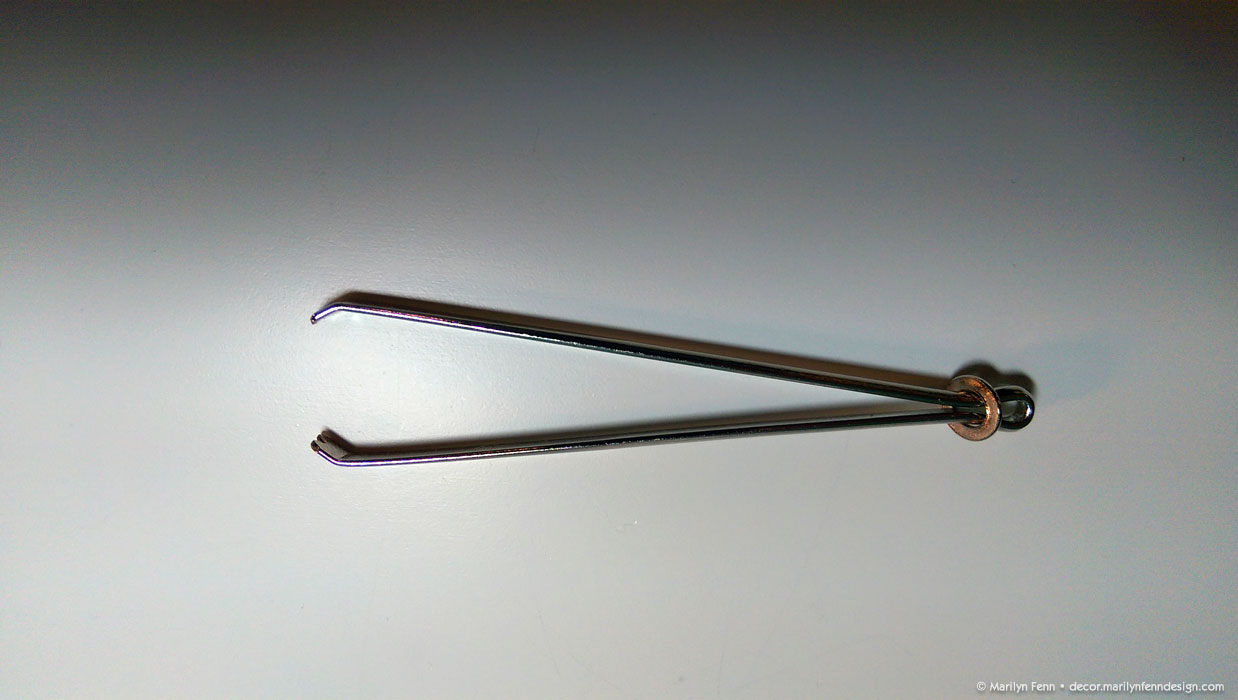
Bodkin – open
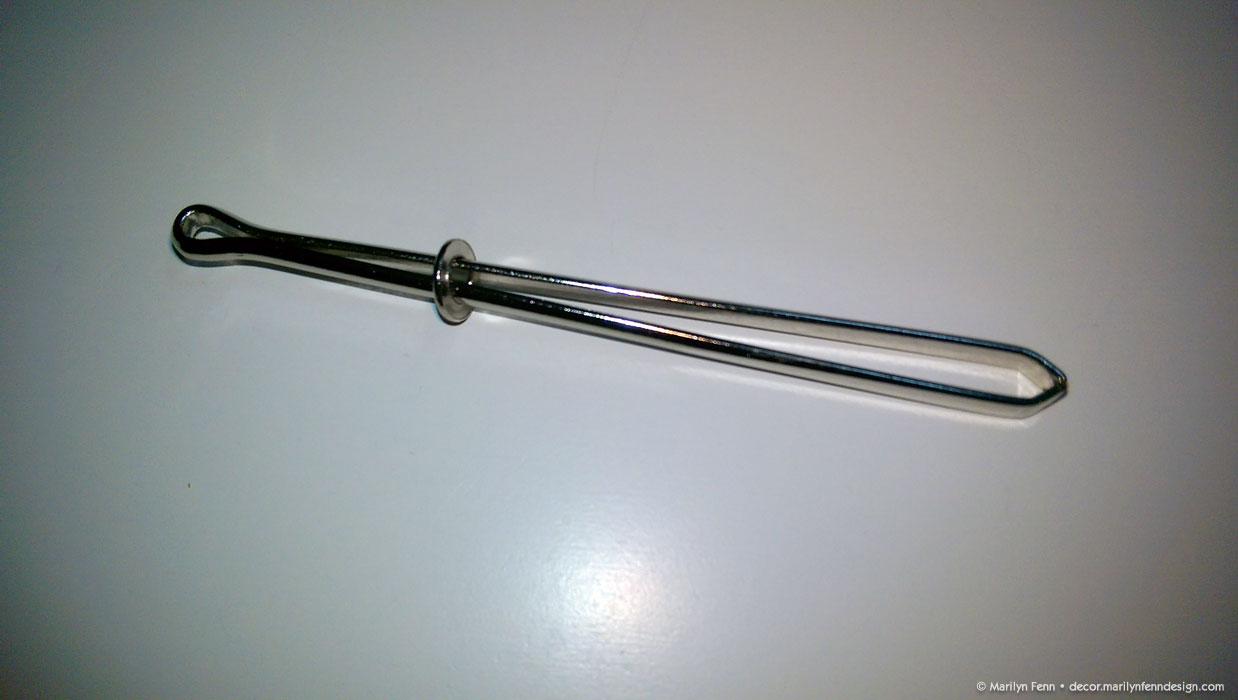
Bodkin – closed
Point Turner & Seam Creaser
This point turner actually does work better for turning the points of pillows and such than the bamboo chopsticks I have been using. I haven’t used it to crease seams yet.
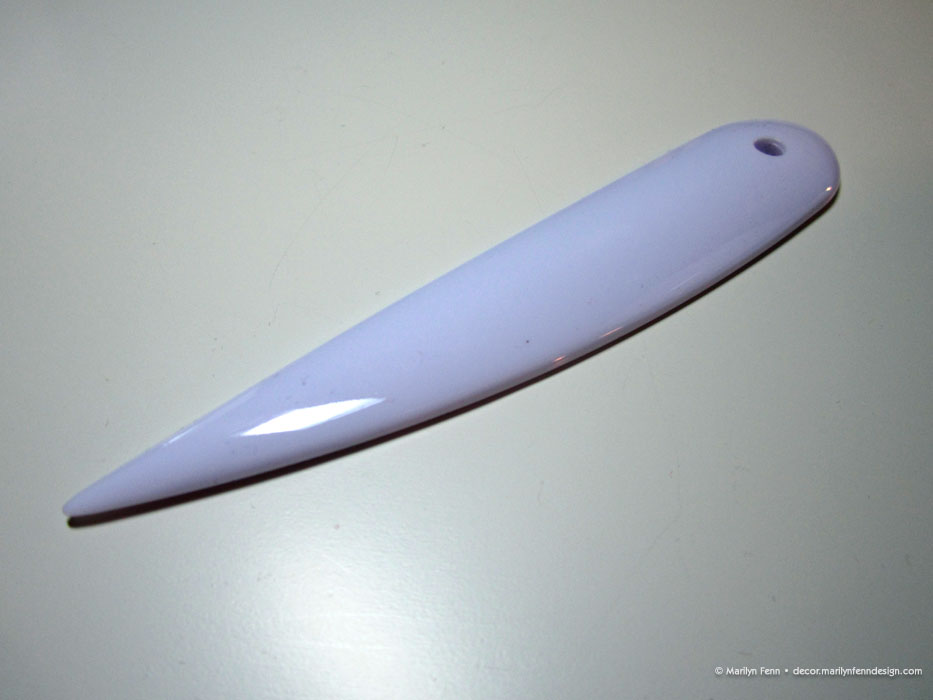
Point turner & seam creaser
Awl
An awl is surprisingly useful for specific tasks (I use mine to poke through the top sticky paper in my new thread spools, so the sticky stuff doesn’t get all over my spool holder — among other, more intentional uses). I wish I had ordered one with a less el huge-o handle, though. The handle takes up a lot of space in my tool (pencil) cup. I may get a skinnier version and move this on to another application/space.
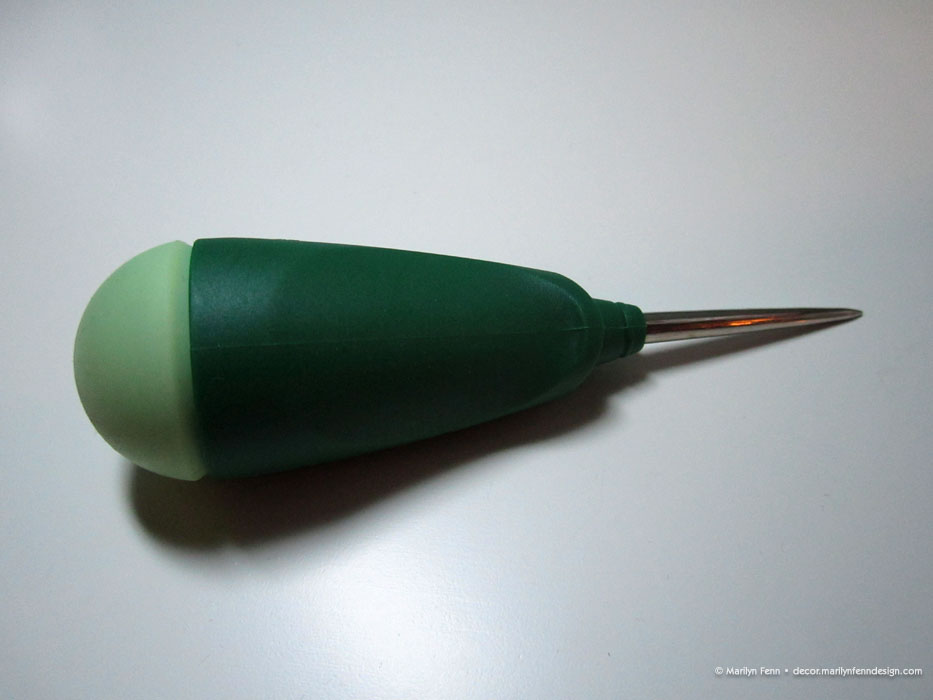
Awl
Lint Brush
Having recently discovered how important it is to keep smutz out your bobbin case, I ordered this Angled Edge Lint Brush. It works fine. A can of compressed air is also recommended for keeping your bobbin case clean.
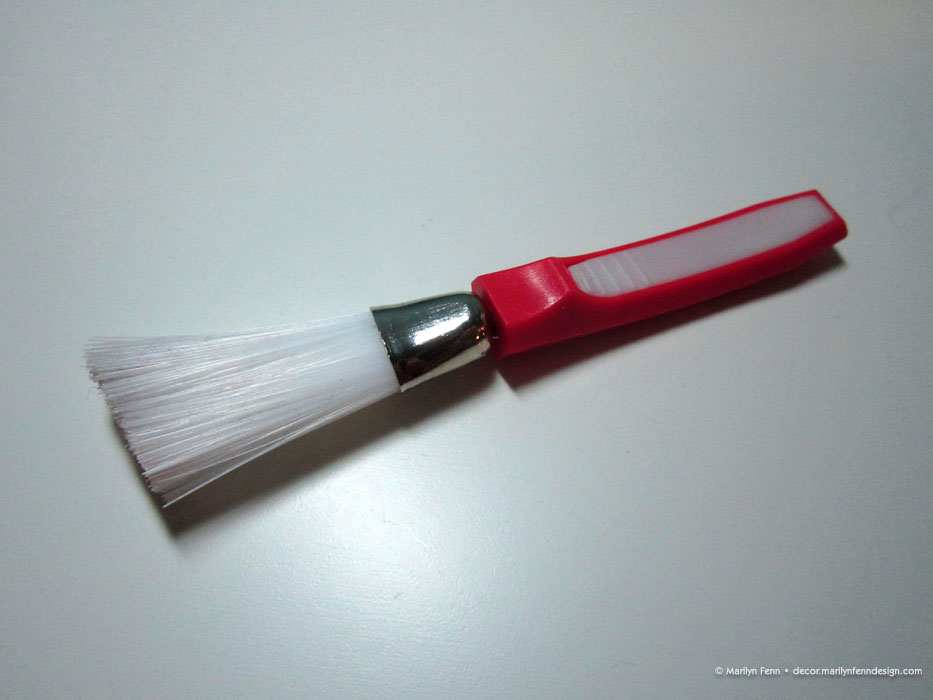
Bobbin brush
Magnetic Seam Guide
This works pretty well. I can place it on my needle plate at any small width, and it helps me keep the fabric sewing straight, and it can be easily removed.
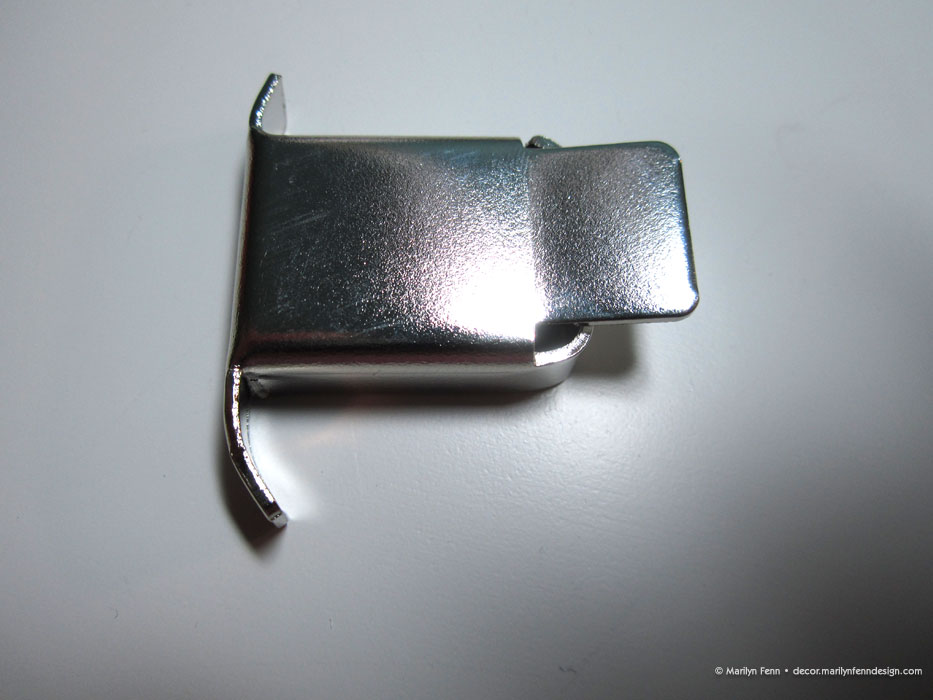
Magnetic seam guide
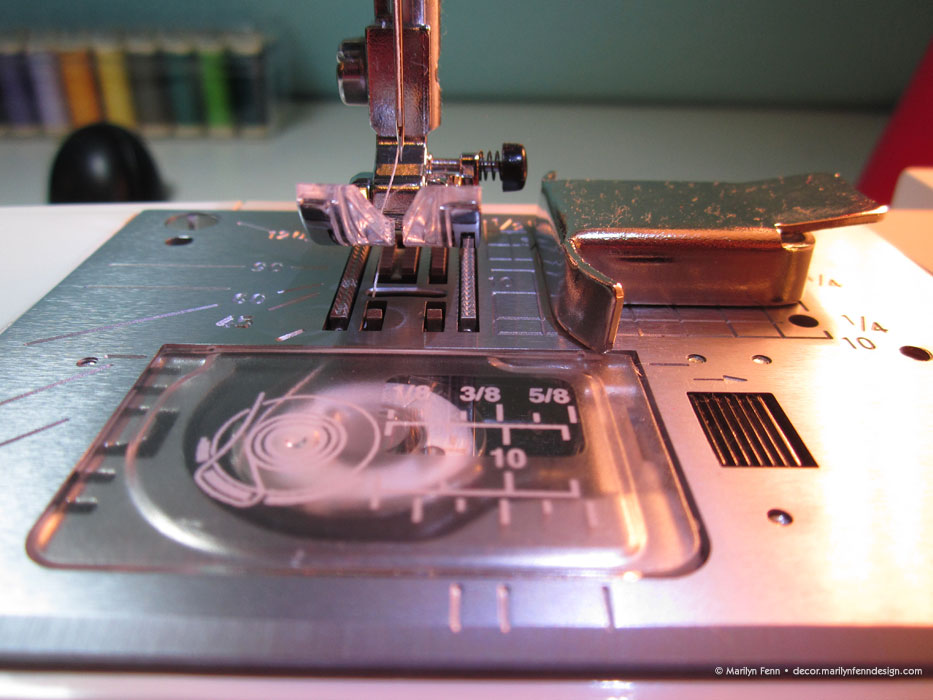
Magnetic seam guide
Large Cutting Mat
I bought this cutting mat a long time ago (I don’t remember when, really — the 80s? 90s? 2000s?) It is great for protecting a large work surface. As it happens, it fits perfectly on my recently acquired cutting table. I’ve had mine so long — rolled up — that it doesn’t quite lie flat (though I hope to amend that over time by laying weighted items on it at night). I’ve also read three negatives about it that you should be aware of:
- it is not self-healing,
- it will dull your rotary blades twice as fast, and
- the printed lines may not be 100% accurate.
I’ve been using mine to measure, pin and cut on with my rotary blades. I think I will start using an Olfa mat to cut smaller items on, now that I’ve read the online reviews.
But I do love that it protects my table, that it is so large, and that it has the grid printed on it with dimensions (in inches and fractions of inches) on all 4 sides. I would prefer that it had a top and bottom to the printing, however, so that when I line my ruler up at the 24″ mark along the bottom edge, for example, that the top edge would also display the 24″ mark. If you decide to buy one, wait for a 40-50% off coupon; otherwise, it’s ridiculously expensive.
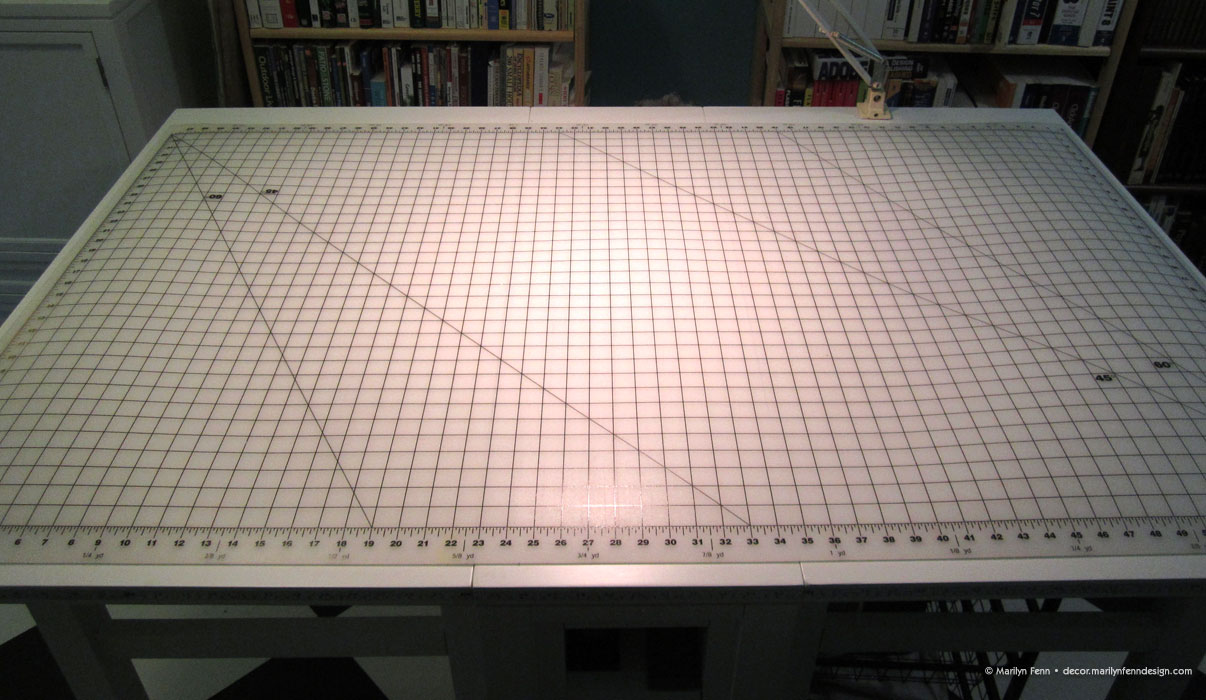
Cutting mat
Olfa Cutting Mat
This cutting mat is supposed to wear out your rotary cutting blades much less quickly. I only have this small 18″ x 24″ one, which is fine for small items, but not large enough for many fabric cutting projects, so I may one day invest in the larger 3-mat Olfa system, when I have a great (at least 50% off) coupon for it.
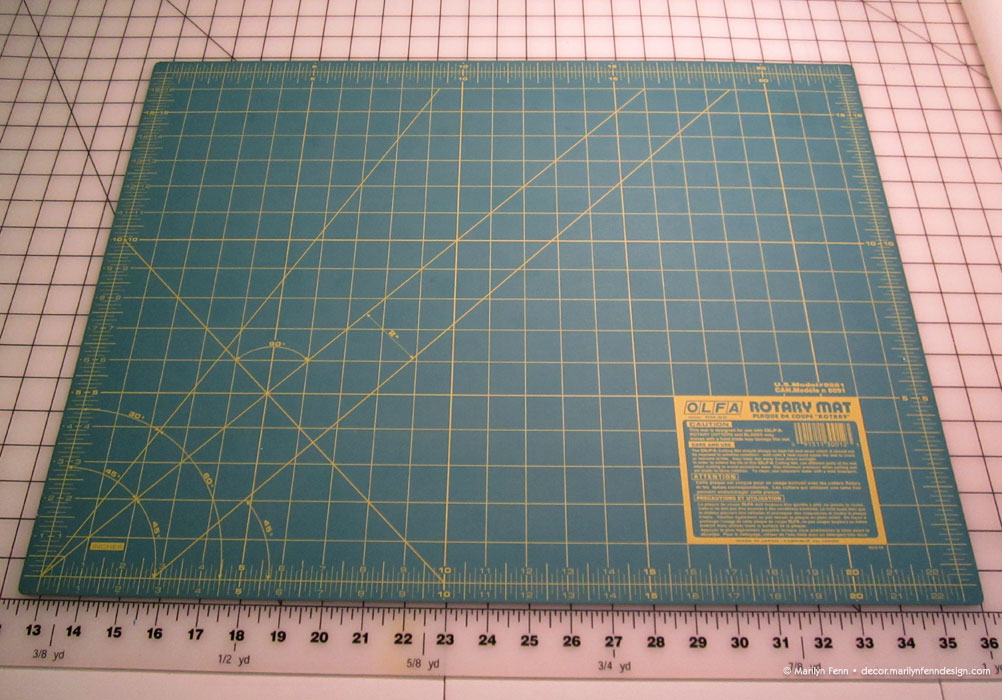
Olfa Rotary Mat
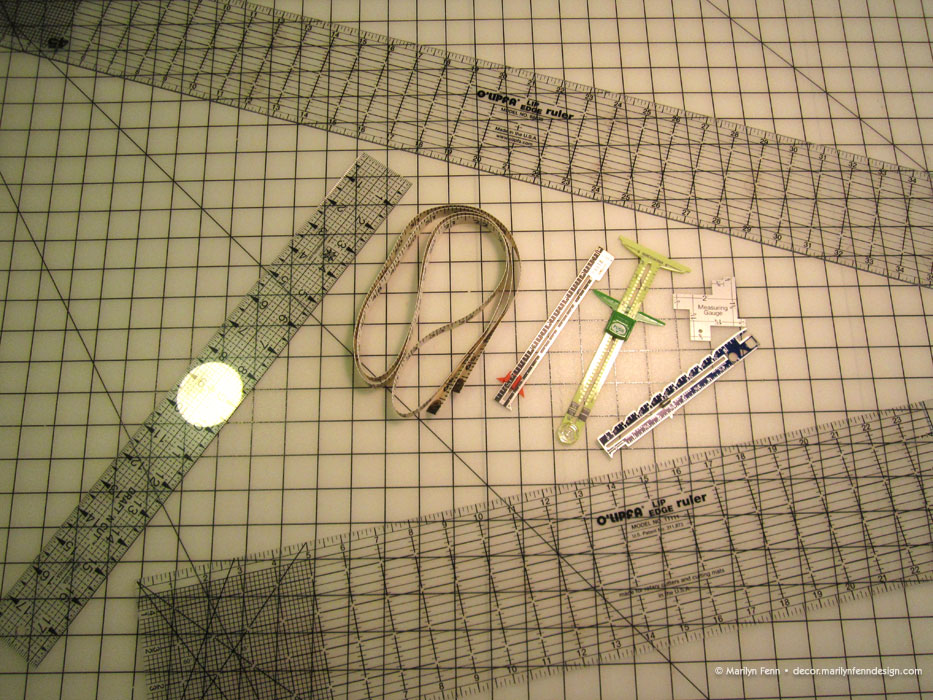
Rulers
See-thru plastic rulers rule when it comes to measuring, marking, and cutting fabric! I started with the 5″ x 24″ lipped O’lipfa ruler, and it’s good, but too short for a lot of cutting tasks, so I recently graduated to the 4″ x 36″ O’lipfa ruler, which is awesome. The lipped edge on both helps keep your ruler in place while cutting with a rotary cutter. I just added some True Grips grippy disks to the bottom surface of each ruler to further aid in keeping the rulers in place. Additionally, I use a smaller 2″ x 18″ ruler for small jobs, but it has no lipped edge. As an artist and former designer/illustrator, I have a slew of specialized rulers I can use as well, but these are the main ones I use for sewing/cutting projects.
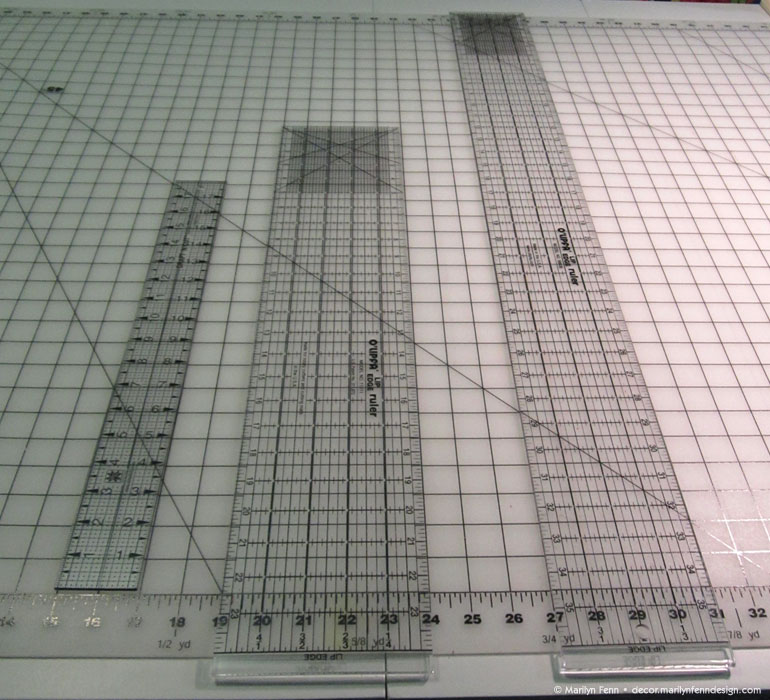
Rulers
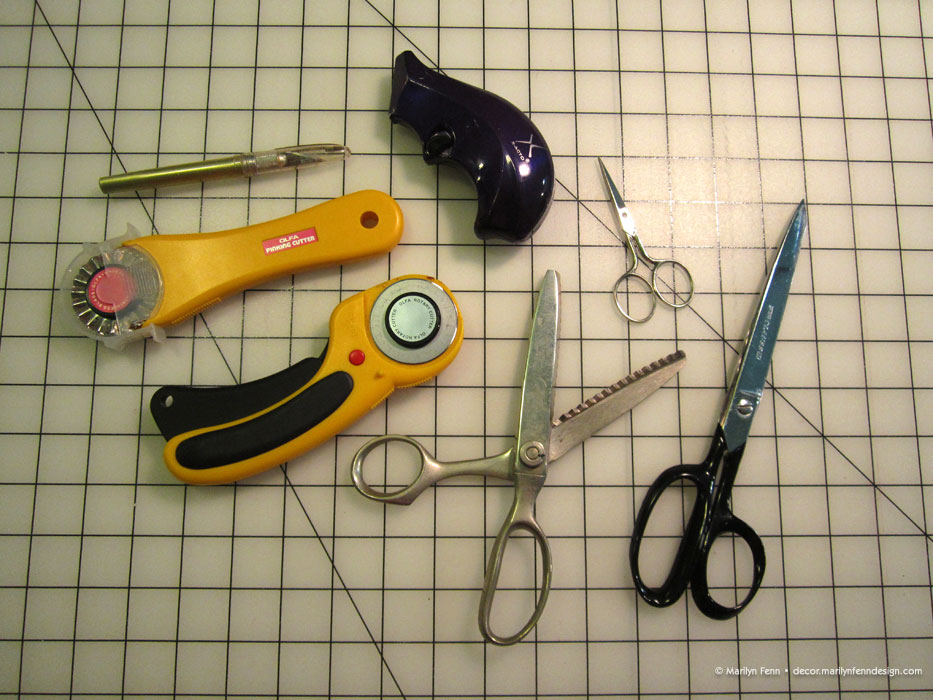
Rotary Cutting Tools
It’s been a while since these things revolutionized fabric (and paper) cutting. I have a flat retractable cutter with several replacement blades, and a pinking cutter. I have a couple fancy edge blades meant mostly for paper, too. Finally, there’s the little flat blade sharpener, which I think works pretty well.

Rotary tools
Fabric Weights
These Wonder Weights are great for holding your fabric in place for pinning or even cutting. They are a very heavy solid something-or-other material coated in a thick casing of plastic and have felt on the bottom. They came in a set of 6 in their own container. You may still be able to find some vintage sets on eBay. It looks like some currently available equivalent may be these pattern weights or this larger set of pattern weights (though these are canvas filled with buckshot, rather than solid weights).
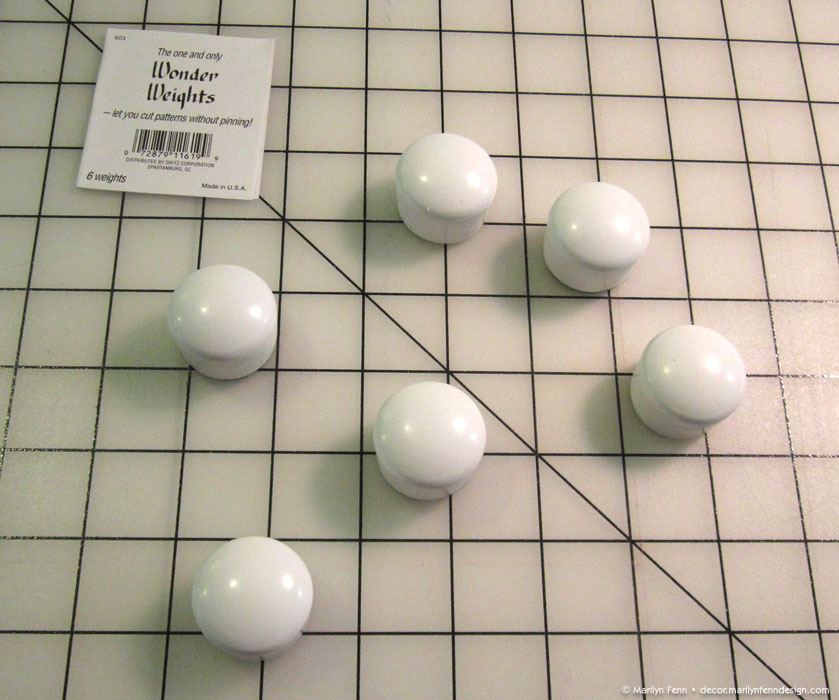
Wonder weights
Wonder weights set
Measuring Gauge
This is a very handy little item. I keep mine in my little box of most-used tools at my cutting table. It’s great for marking seam allowances when you make your own patterns, for example. You can get one just like it at Jo-ann’s or a similar item at Nancy’s Notions.

Measuring gauge
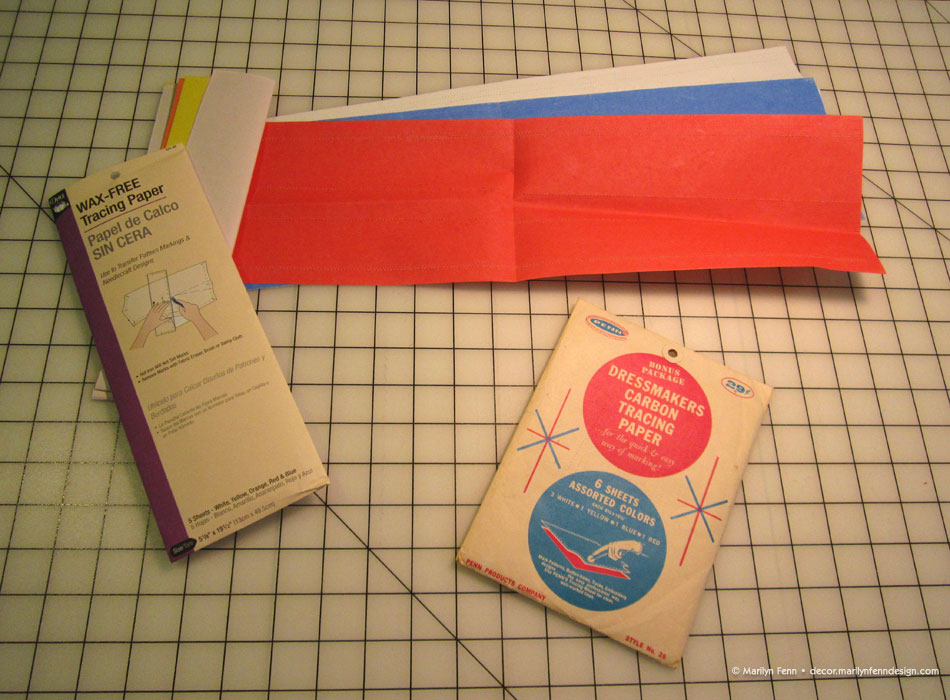
Tracing/Pattern Paper
I just received a roll of light tracing/pattern paper from Nancy’s Notions, but before that, I used sheets from an old pad of artist tracing paper to make my own patterns. I should mention that the roll from Nancy’s Notions came unwrapped in a box with other stuff; I guess because it sells as a set of two rolls, but you can also order just one. Also, it’s not exactly like pattern paper, but more like a thin roll of freezer paper — waxy on one side, and matte paper on the other. It will be nice having a roll to handle length, and I guess if I need more width for anything, there’s always tape, or I’ve just discovered you can get thin rolls up to 36″ wide at art supply stores.
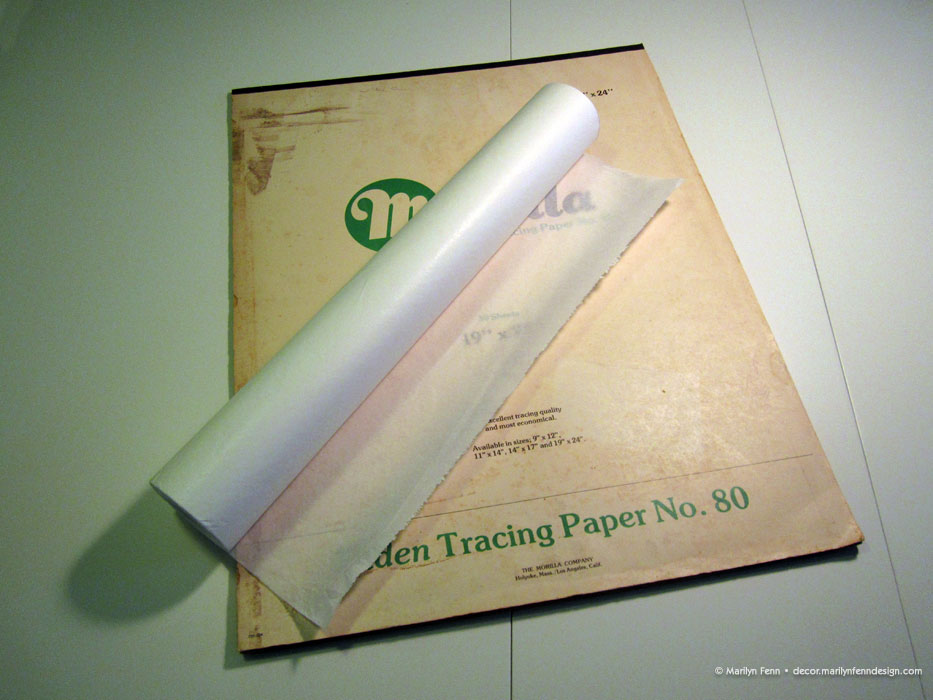
Tracing paper
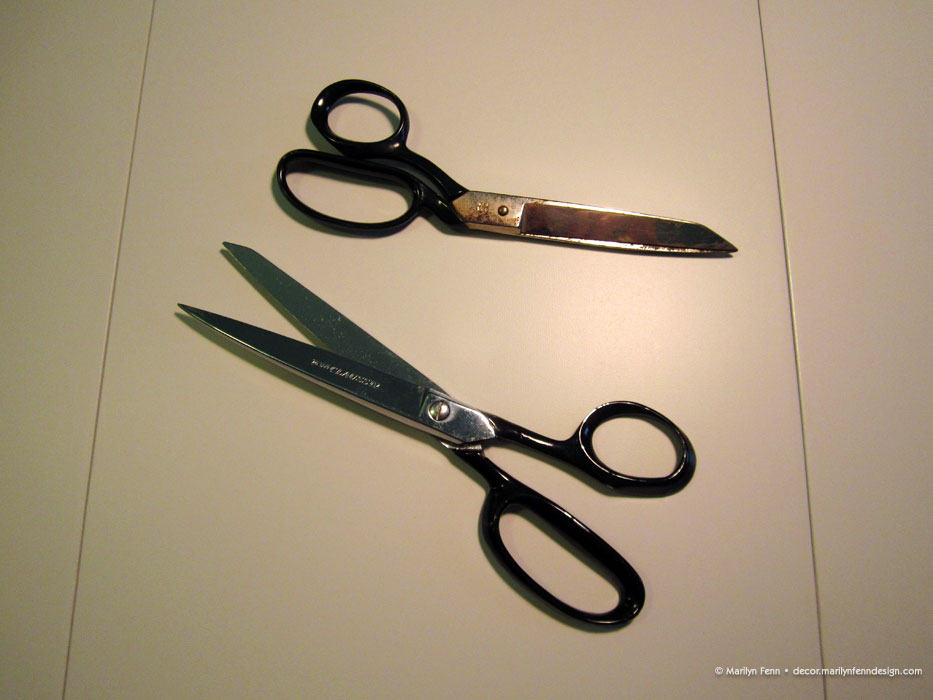
Good Sharp Sewing Scissors
Your sewing scissors need to be very sharp. Never use them to cut paper. I’ve had these since I took Homemaking in 8th grade, and I probably should have them sharpened (there is a dull spot on one pair), but for the most part, they are still almost as good as new. If I had to buy a replacement pair today, I would probably go for these bent-handle scissors by Gingher.
Scissors
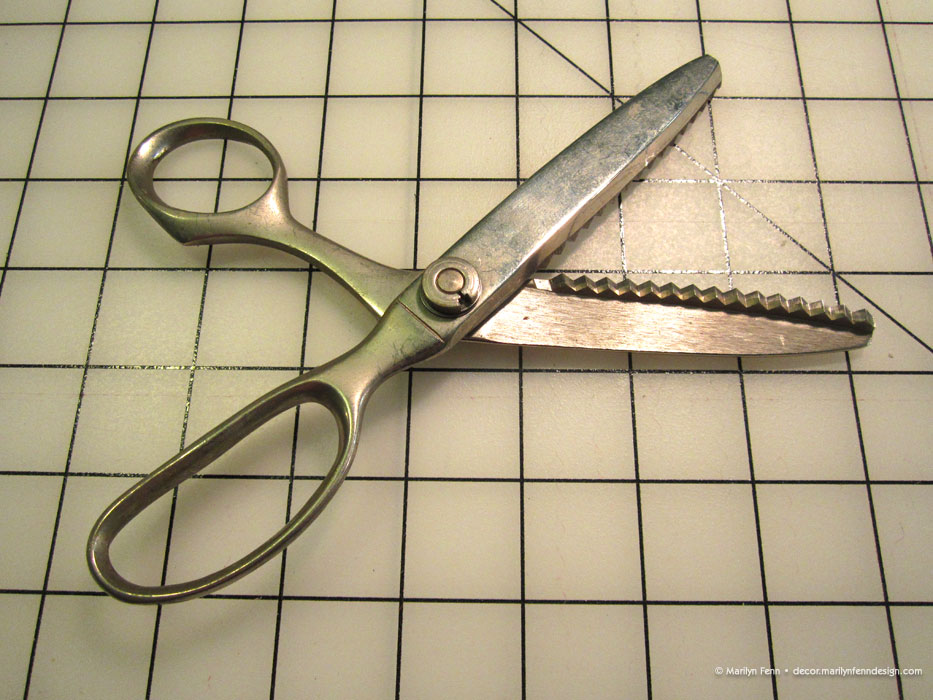
Pinking Shears
These are another great tool from my junior high school days. I use them sometimes for cutting out fabric when I want a pinked edge. They do need to be sharpened after all these years, as there is a spot that doesn’t cut, but just makes a mess (so I try to avoid that spot; kind of inconvenient!). I don’t have a recommended replacement for these, but if I find something with good reviews, I’ll edit this.
Pinking sheers
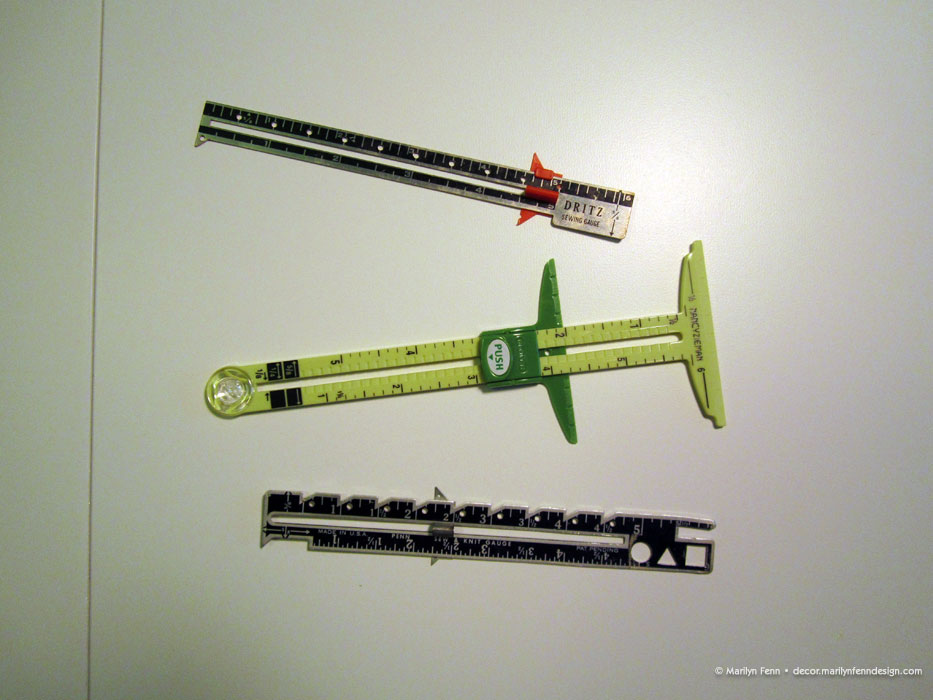
Sewing Gauge
These are so useful for measuring and marking distances up to 6″ (like hems), for making 5/8″ and 1/4″ marks, to mark set intervals of half-inch (or multiples thereof), for drawing circles, and for transferring measurements from one place to another.
Measuring and marking guides
Tracing Paper
Great for marking fabric. I use them especially to mark seam allowances where having a mark matters during the construction of the piece.
Tracing paper
Tracing Wheel
Use this with the tracing paper to make those marks.

Tracing wheel
Seam Ripper
Hardest working tool in my sewing room! 😛 Seriously, this is a greatly useful tool for anyone, anytime you need to remove any stitches from anything. Well, not the kind of stitches that hold body parts together; use only for fabric.
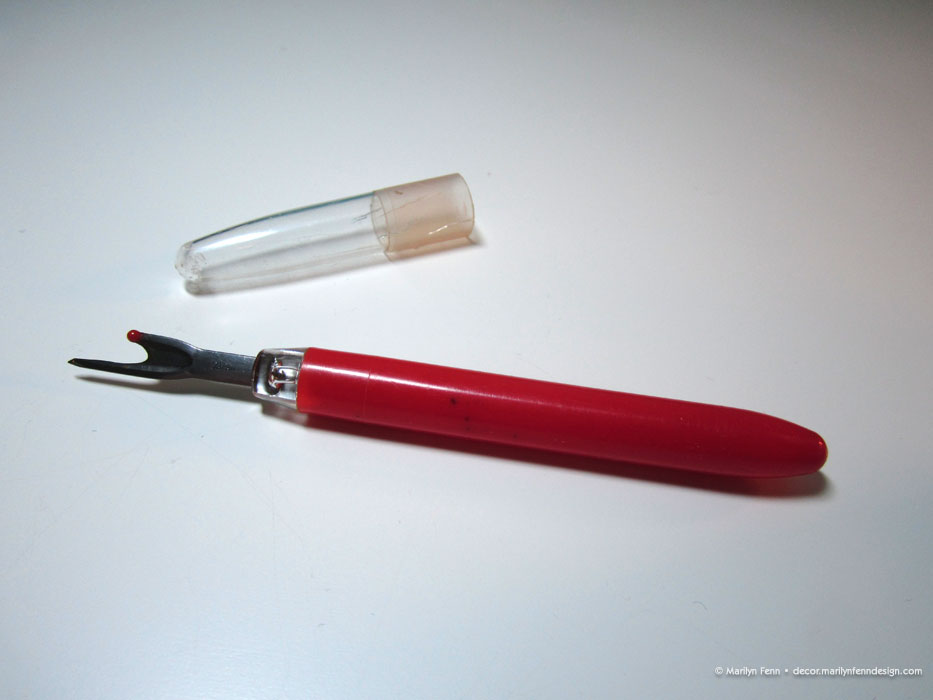
Seam ripper
While making pillows and cushions, these were the four presser feet that I kept switching between.
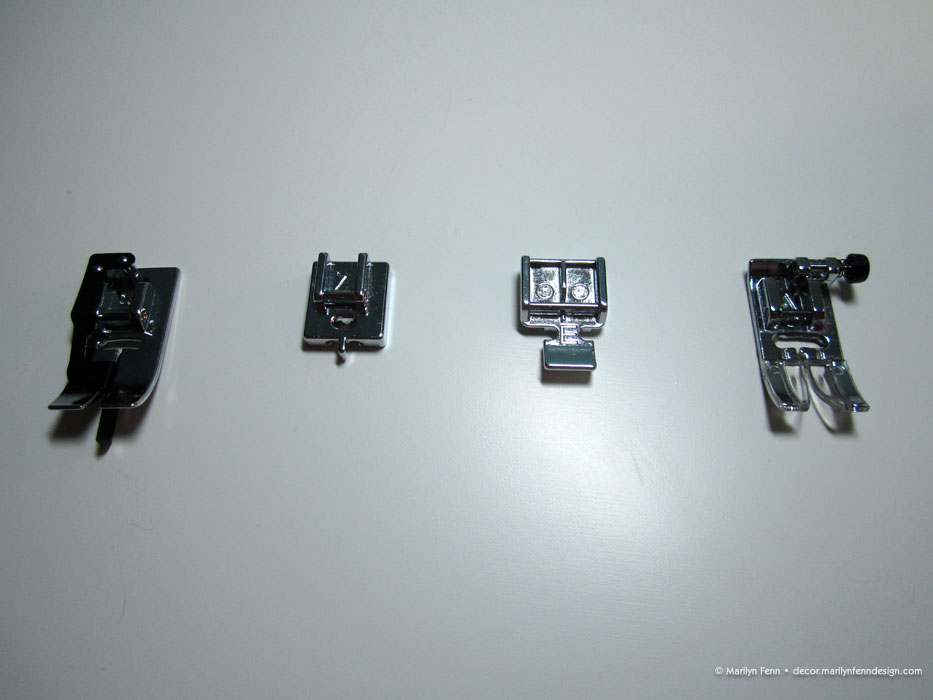
Presser feet useful for pillows and cushions
Zigzag Foot
The main “default” foot, used for regular straight stitching or any zigzag stitching.
Zigzag foot
Zipper Foot E (Janome)
Very useful for inserting zippers or for doing any super-close stitching (like piping). You can insert the foot either on the right or the left half of the connecting bar, depending on which side you need to sew close to.
Zipper foot E
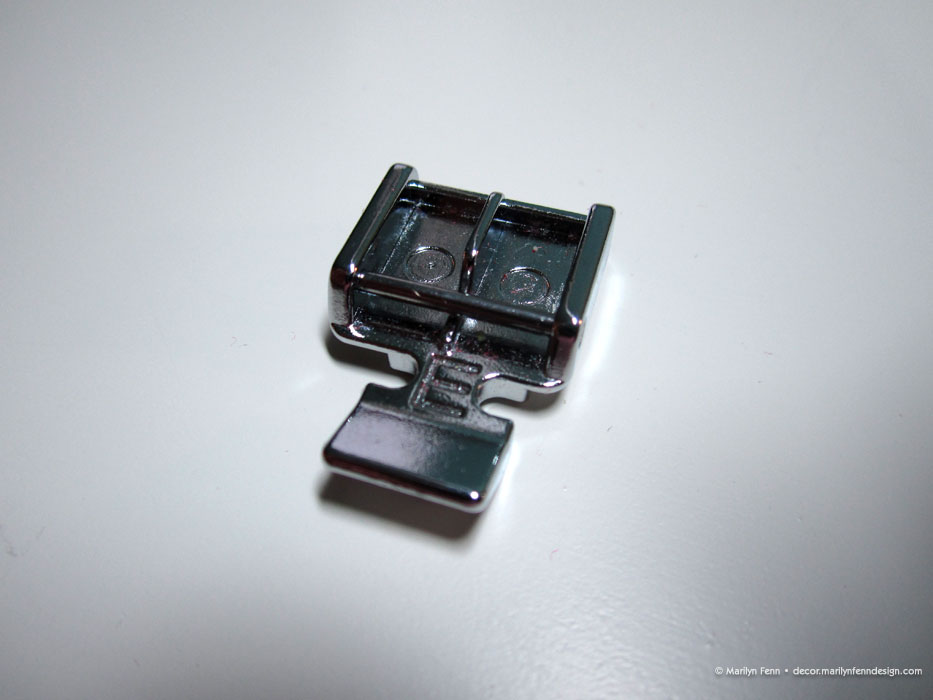
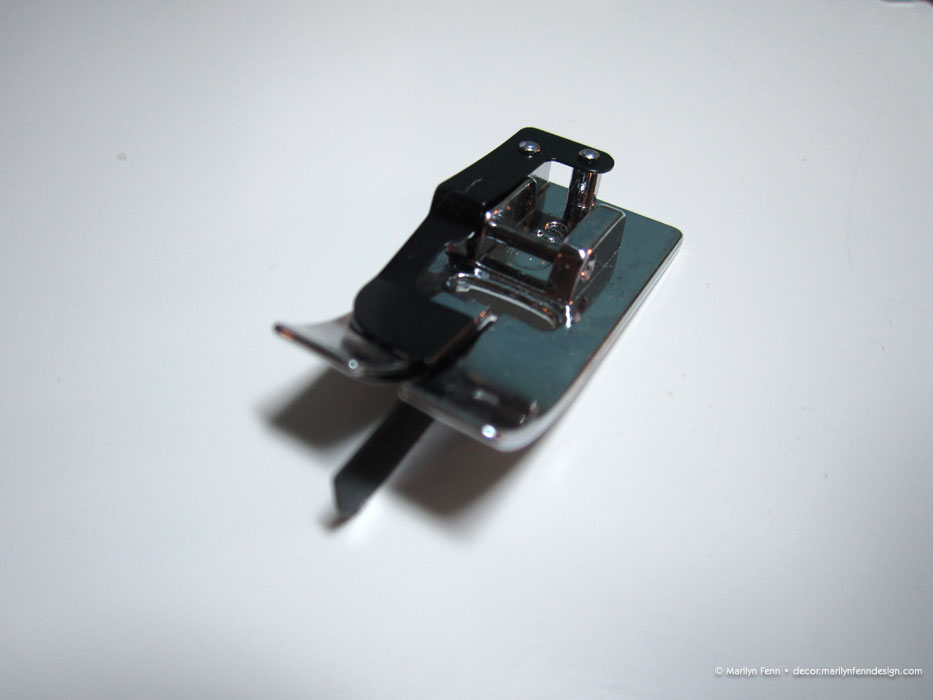
Concealed Zipper Foot
This foot has two channels that accept invisible zipper teeth, allowing you to sew right next to the teeth, and can be used either on the right or left side of the teeth, depending on which side the zipper tape is on.
Concealed zipper foot
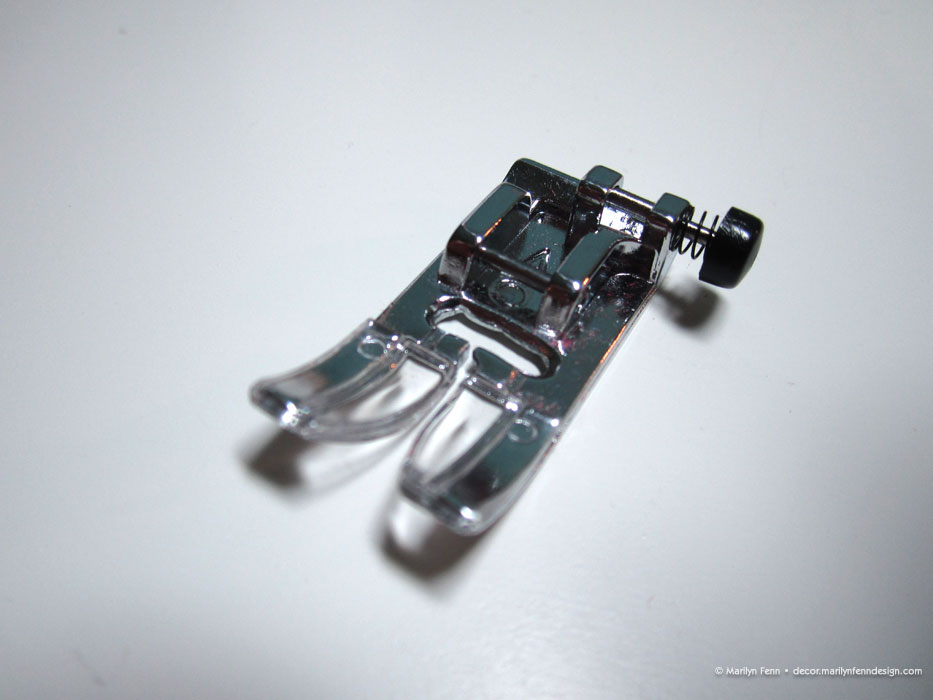
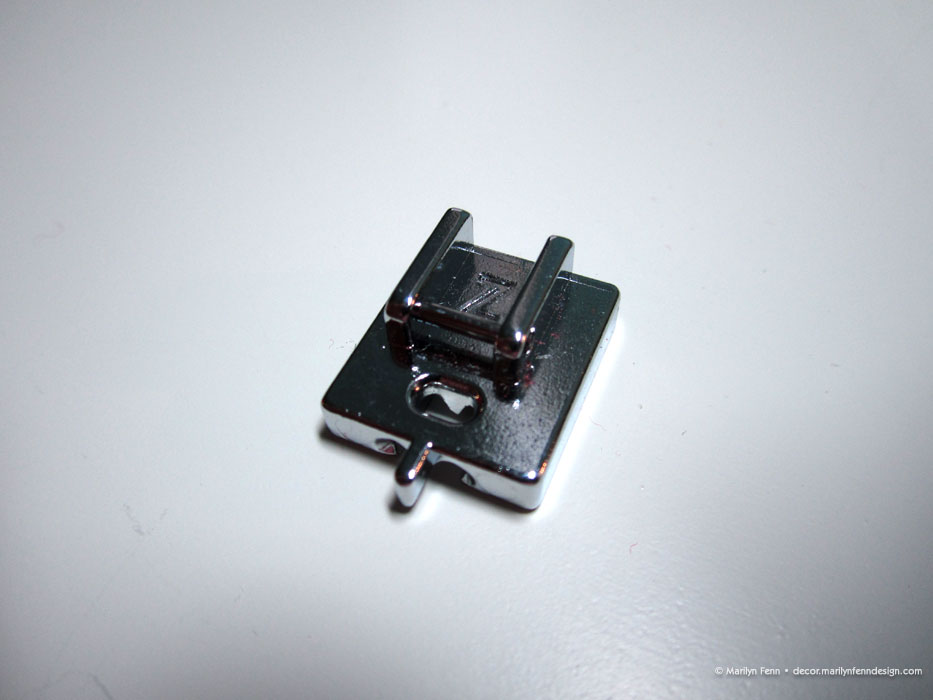
Ditch Quilting Foot
I found this to be extremely useful for sewing a basting stitch between an invisible zipper and piping. The black bar rides in the tiny “ditch” between the two, and stitches right down the middle.
Ditch quilting foot
I’m almost embarrassed to admit that many of pieces in my little attic room came from the Martha Stewart Living Craft Space collection at HomeDecorators.com, part of Home Depot. I started with a flat file cabinet, for my art on paper, and I liked that so well, I got the storage cabinet seen below.
Cutting Table
I LOVE this table! Fully opened, it’s a good size of 60″w x 40″d — just perfect for the cutting mat I bought so many, many years ago — and it folds down to 14″w x 40″d. Whether folded, half-folded or fully open, it rolls easily on the eight casters. It has 4 cubbyholes that extend through the entire depth of the center section. I use the top two for storing long things, like rulers and rolls of paper, and I added two drawers to each side of the bottom two cubbies for storing smaller items. I’ve used this as a support on which to build and stain my hand-built desk furniture, as a surface for painting (with drop cloths, of course, protecting the table), and of course, for marking and cutting fabric. It is the most useful piece of furniture I own. The only downside is that it is only 31.5″ high, which is a tad low to work on, if you’re tall. I would have preferred it at 36″ high, but they don’t make this at any other height.
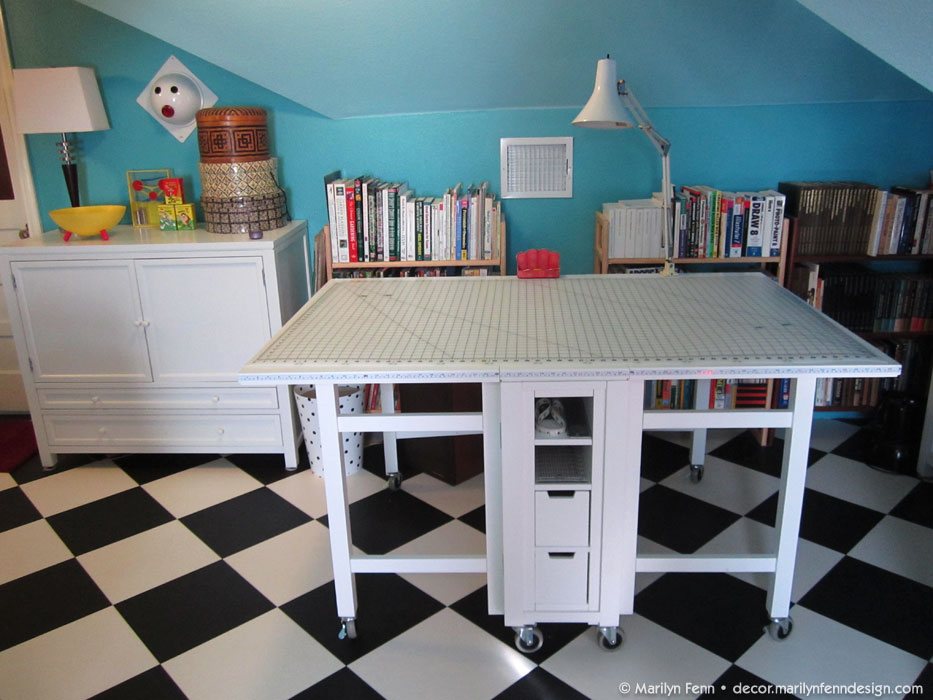
Collapsible cutting table with storage cubbies
Cubbies for storing long things, and drawers for storing smaller items.

Storage cubbies in cutting table
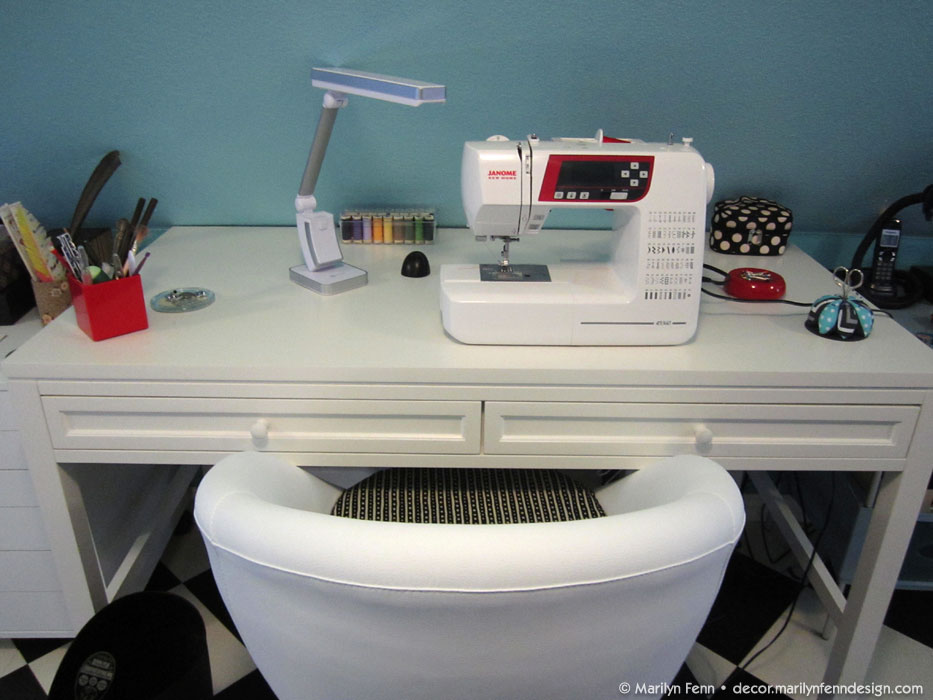
Sewing Table
I was planning to build my own sewing table to my own design specs, but that would have been a huge project, and no guarantee that it would have turned out well. I decided to go ahead and get this table that matches the cutting table, and I am so glad I did. It’s a good size, and has two very large, though short, drawers. I inserted two zigzag inserts to store my thread, and I store tools and supplies in various organizers from the Container Store in the other drawer. This comes in two heights: 31″ and 36″, but I needed the 31″ height to fit under the sloped roof of the space.
Sewing table
Thread, tools, and supplies storage in the two drawers.

Thread storage
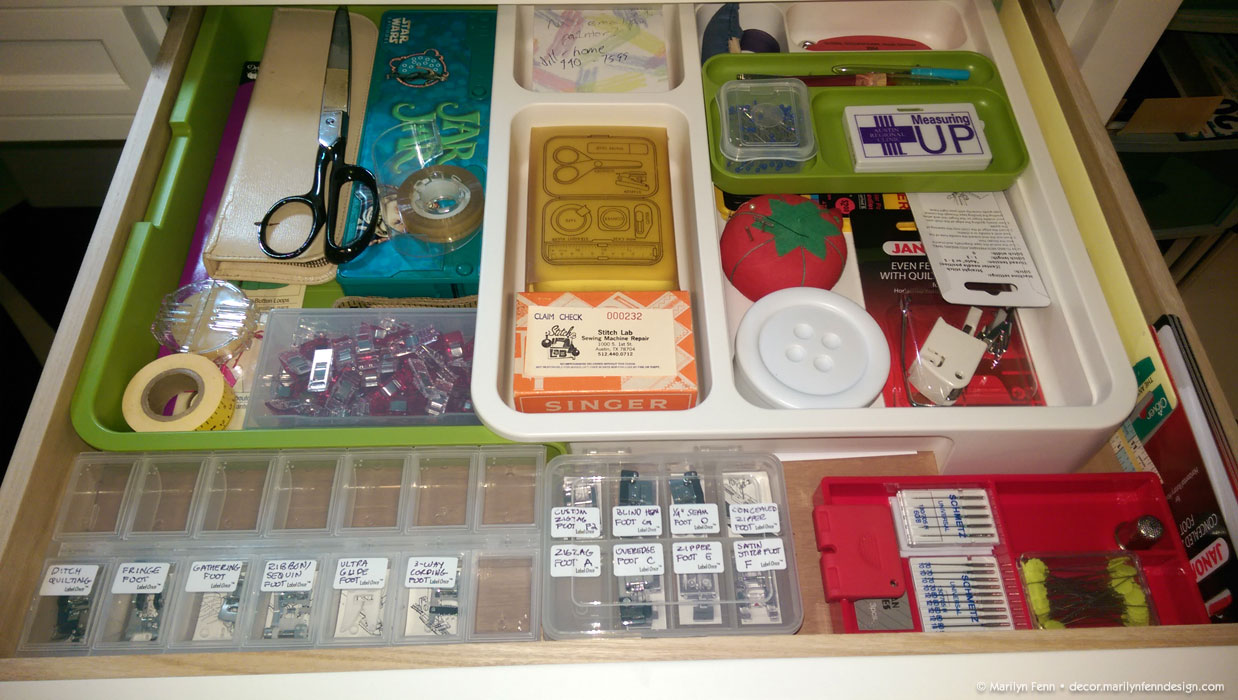
Tools and sewing supplies storage
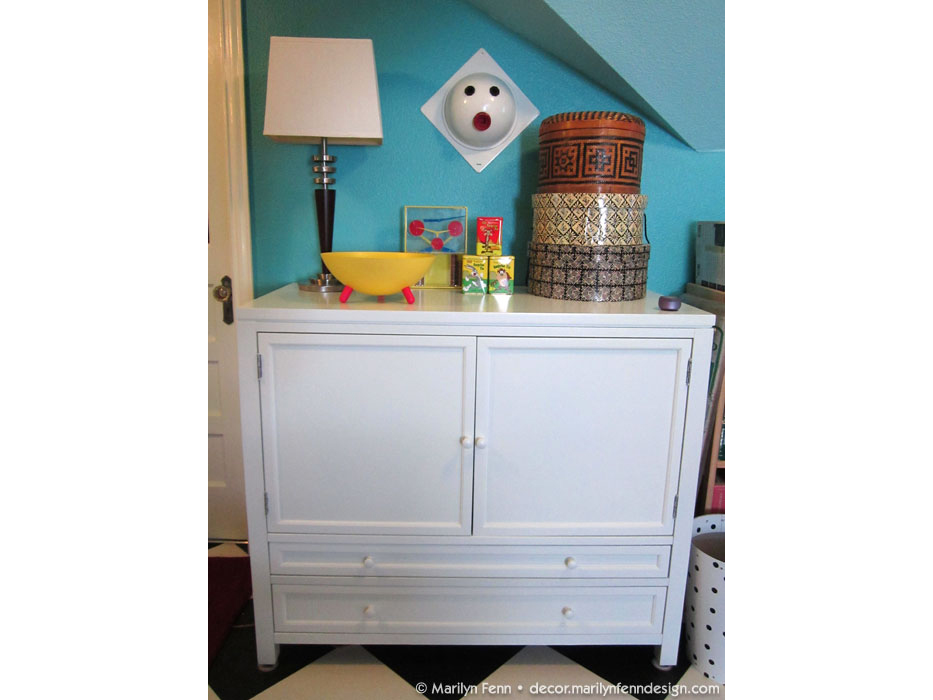
Storage Cabinet
This is a nice attractive piece of furniture with deep storage on one side, two wide storage drawers below with dividers for those drawers, door storage for narrow items, and deep slide-out trays for fabric or paper.
Storage cabinet
Deep storage, slide-out trays, and door storage.
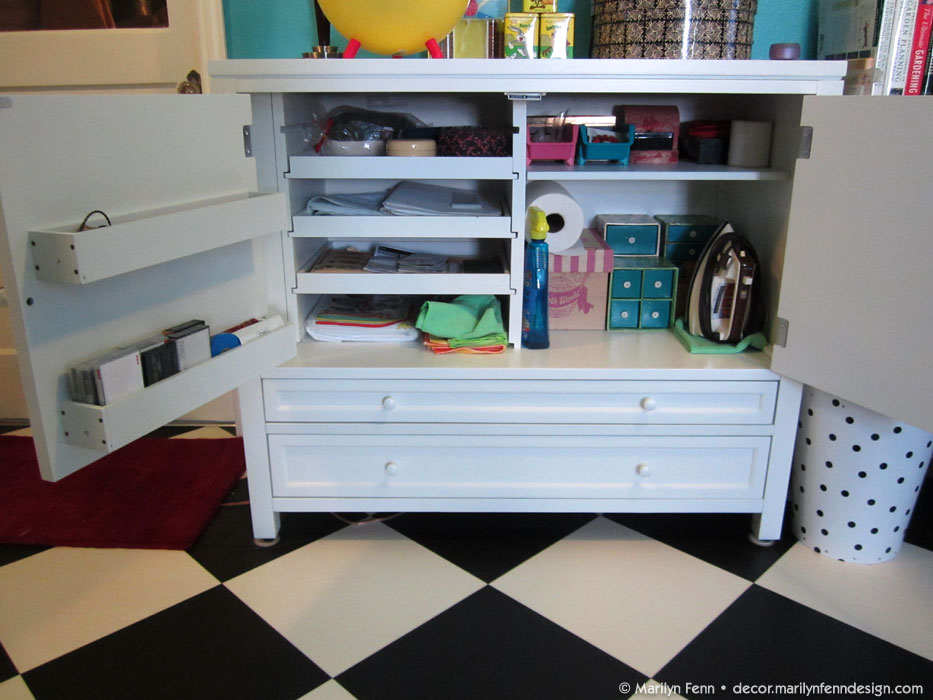
Storage cabinet-open
Wide drawer with dividers.
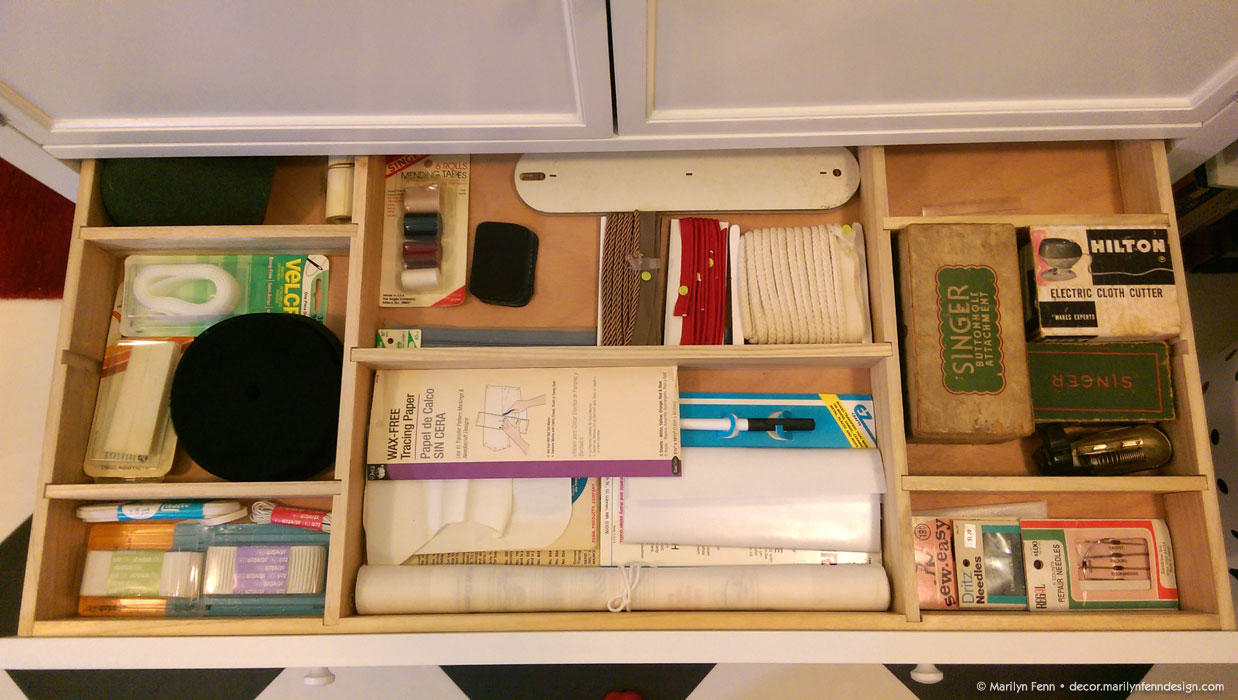
Storage cabinet supplies and tools drawer
Wide drawer used for storing fabric.
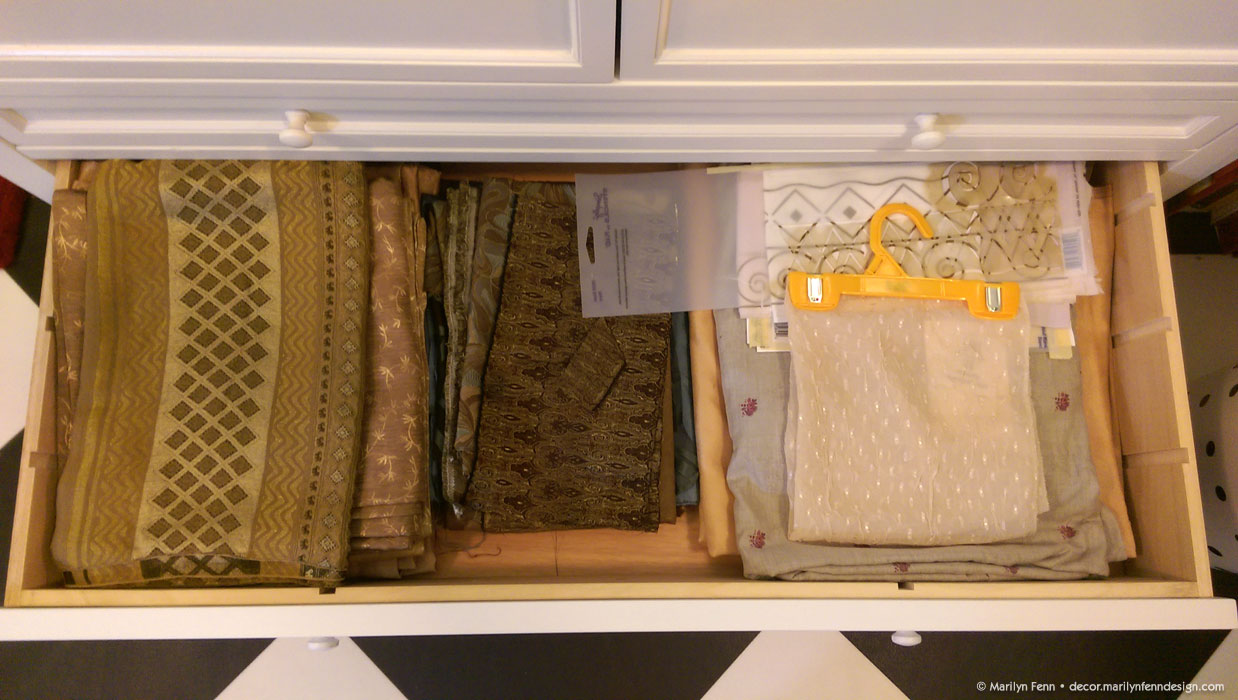
Storage cabinet fabric drawer
Alex Drawers
These are just great little drawers. I use mine for fabric storage. It’s a rolling cart, too, so that can be very handy. So far, mine has found a nice seemingly permanent home right next to my sewing table. This was also much easier to assemble than the cabinets and tables above.
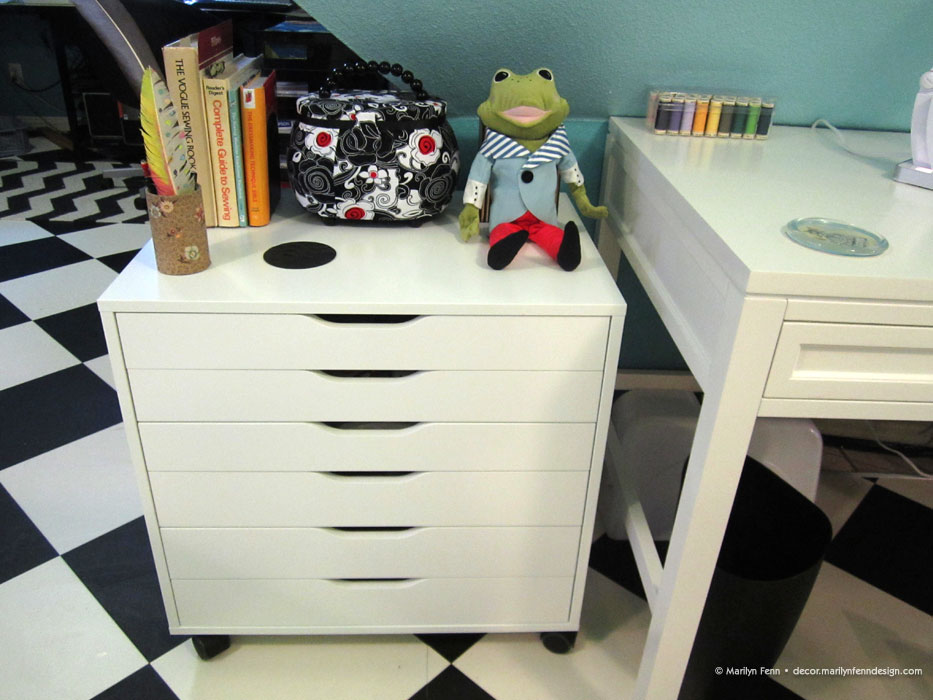
Alex drawers
Rolling Cart
The first time I saw this little rolling table in the Ikea catalog, I fell in love with it. It is so cute! It looks like something that just landed. And it is the final (I think) piece of furniture for my sewing space. When I’ve got fabric all over my cutting table, I discovered, I needed a place to keep my tools close at hand, and this does that perfectly. There’s storage inside as well, and I can roll it under my cutting table when not needed. I’m so glad I found a great useful purpose for this adorable little table.
[It’s called the Vettre Nightstand, in case you’re looking for it. All furniture items are linked in their respective titles.]
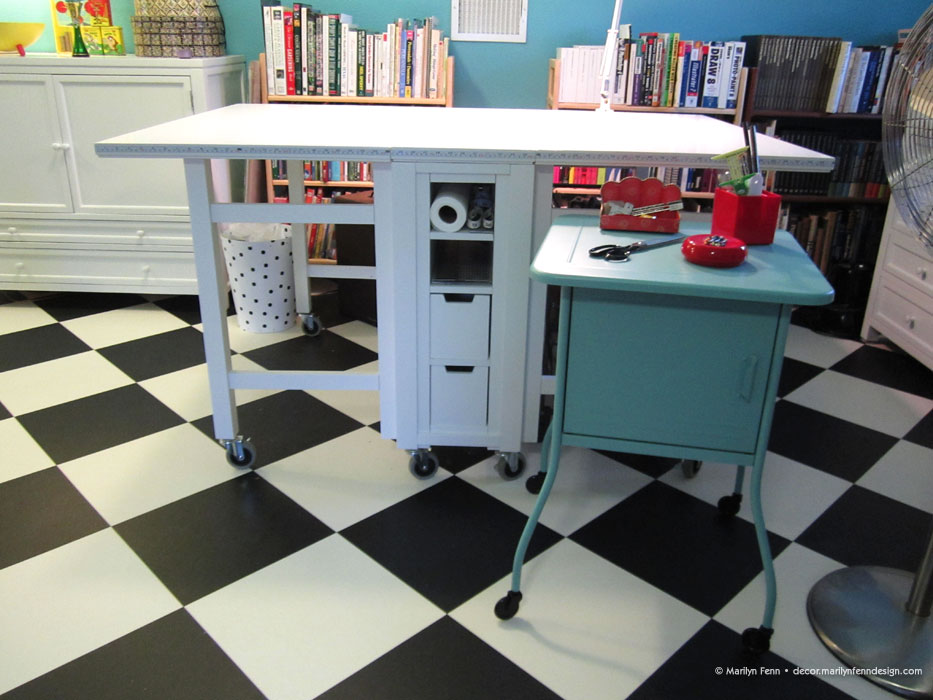
Tool storage side table

Leave a Reply